How to Install & Import Presets in Adobe Camera Raw (ACR)
Using the included Installer
Note: If you have installed the presets into Lightroom Classic (Icon LrC), the presets will automatically install into ACR.
- Open an image in ACR on your desktop computer.
- Navigate to and unzip the .zip file downloaded from your Mastin Labs account.
- Navigate to Folder from .zip file > Folder titled "3. Desktop Presets for Lightroom Classic CC"
- Double click on the Installer for your chosen operating system, this will automatically install the presets.
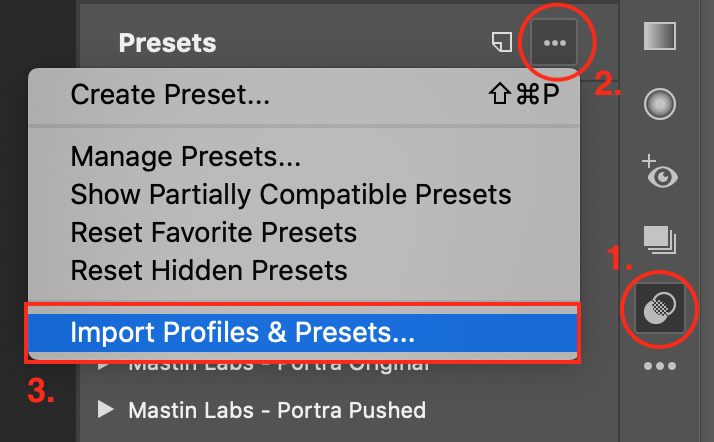
- Navigate to ACR to select 'Presets' in the right-side menu (See 'Step 1' in Visual below).
Alternative Manual Import
- Navigate to and double click the .zip file you downloaded from your Mastin Labs account to open folder.
- Open an image in ACR on your desktop computer.
- Select 'Presets' in the right-side menu (Step 1 Visual below).
Click on three dots (step 2).
Lastly, select 'Import Profiles & Presets' (visual below) (step 3).
- Navigate to Folder from .zip file > Folder titled "3. Desktop Presets for Lightroom Classic CC"
- Open the ‘Lightroom CC - Manual Import (Optional)’ folder and double-click the [preset pack].zip file (visual below).

- Repeat the process to install the 'camera specific' presets in addition to the original set (only if you are using Canon R5/R6 or Fuji X-T3/T4).
